Monday, November 27, 2006

Creating a Google Gadget Tips-Like Widget :: Part 2 :: Making It Reusable

In the first part, we looked at how we could create the Google Gadget Tips-Like Widget using the Bindows JavaScript toolkit. Unfortunately, what we created wasn't reusable (i.e. we couldn't instantiate it to make more of the same thing) which made the component pretty useless (a component is synonymous with a widget; Bindows uses the word component to mean widget). However, our prototype did demonstrate functionality and that's what it was supposed to do.

If you missed the first part, you can find it
here.

In this second part, we'll take what we've done and make it so that we can create any number of components with something simple like this --


To start, we need to think about what the developer will use the component for. Here are a number of things that he'll want do with our custom component (let's call this the VerticalTabComponent) --

  • Use their own grabber
  • Give the grab label a completely different name
  • Customize content in the tab pane
  • Control background (and foreground) color
  • Replace the default close button with something more snazzy
  • Etc.
The important point to remember is that the developer customizes the component to suit their particular needs. This means that we need to make customization as easy as possible.

So, armed with that information let's derive VerticalTabComponent from BiComponent.

Basically, we need to put the members and functions from BiComponent into the prototype scope of VerticalTabComponent. We'll also need to call the BiComponent constructor (function) on behalf of the derived component like this --


We'll also expose a few privileged functions (these are like public functions but have access to private members) --


Notice the granularity of the functions. Most of them return derivatives of BiComponent rather than objects like String (i.e. the tab button label, etc.). As we noted in the first part, "BiComponent is by far the most useful component in Bindows."

Of course, much of what we expose to the developer is based on how much we wish to abstract. For example, look at these two functions --


Why on earth would we want to set the background color this way when we can use the power of CSS?

As it turns out in this case, we do want to hide some of the details. When we set the background color for the VerticalTabComponent, what we're really doing is setting the background color for an internal container. This is something that the developer shouldn't worry about.

You'll also notice that we only expose functions. We didn't expose any of the member variables. We want to control what the developer has access to and directly grabbing member variables is not what we want.

We've also removed almost all of the inline styling and placed them in an external CSS file. Bindows uses the concept of themes and to use that we need to define an appearance which is nothing more than a selector rule found in the CSS file within the theme.

So, we'll define the appearance and then make sure that the selector rule is the same name as the appearance. Here's one example of how we create appearances. This one is for the internal container --


Within the theme.css file, we'll add these selector rules --


If you look in the VerticalTabComponent, we did keep a few inline styles --


We did this to styles that change the state of the component that are independent of the theme.

In general, when we make a reusable component, we should do our best to move the styles out of the code and into an external file. In essence, what we are telling the users of our component is that these selector rules are free for you to modify.

Lastly, we'll have a few event handlers to deal with behaviors like dragging, mouseovers and mouseouts --


We're now ready to create the component and with a single line of code we have magic --


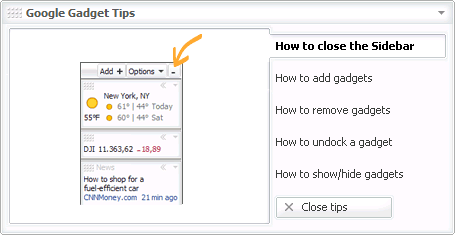
If we wanted to create a look different from the default "Google", that too is easy, but a bit wordy. Here's the code for a "Meebo" (http://www.meebo.com/) like look --


That's all there is to it. If you're interested in the example, the implementation is found here.

You can download the entire sample
here (including the VerticalTabComponent). Of course, you'll need the Bindows JavaScript Toolkit. My example uses Bindows 2.5, but any version of Bindows should work. Have fun!


Friday, November 10, 2006

Creating a Google Gadget Tips-Like Widget

I recently had to rebuild my laptop which meant reinstalling software including the very useful Google Desktop.

During the installation, the Desktop installed Google Gadgets and the "tips" dialog --


Basically, the dialog is a series of help screens accessed by mousing over the vertical tabs. You really can't put too much information in each pane, but I thought that the vertical tabs were unique and worth imitating for a web application.

To do that, I'll use the
Bindows JavaScript toolkit. Originally created by Erik Arvidsson, it's an incredibly complete and powerful DHTML/Ajax framework for building web applications. It's definitely not the only one around (i.e. Dojo, Tibco's General Interface, etc.), but I use it everyday and I'm pretty familiar with it.

(For this post, I'm not going to go into the basics of how to build a Bindows application. Yoram Meraiz and his Team at MB Technologies have great
tutorials and a lot of examples to get you started.)

Whenever I "imitate" or prototype something, the first thing I do is look at the behavior of the thing. All the visualizations (i.e. the "pretty" things) come last. So, from the Google's help dialog, we know that our model --

  • Will listen for events (i.e. mouseover a tab and the pane changes)
  • Can be dragged (another event is dispatched)
  • Can be closed by clicking a button
  • Has text for each tab and the title of the dialog
  • Has images for content in each tab pane
With that we can map that functionality to our toolkit.

  • To listen for events, we will need a BiComponent
  • To drag the dialog, we will need a BiComponent
  • To close the dialog, we will need a BiButton (a derivative of BiComponent)
  • For the titles, we will need a bunch of BiLabels (another derivative of BiComponent)
  • For the content in the tab pane, we will need a bunch of BiImages (another derivative of BiComponent) as well

It's a pretty good bet that we'll use BiComponents.

The BiComponent is by far the most useful component in Bindows for a number of reasons --

  1. A BiComponent understands events. In other words, a BiComponent listens for and can dispatch events
  2. A BiComponent can add other BiComponents. This means that they can function as a group (i.e. they can be dragged, hidden together, etc.)
  3. A BiComponent can be styled inline (naughty, naughty) or by selector rules (i.e. via a CSS file or in Bindows parlance, a theme)

Let's take a look at how we use the BiComponent to imitate the Google help dialog.

First, we'll take advantage of the fact that we can add components together. So, we start out by creating a container to hold all the other parts of the dialog. Not surprisingly, the container is a BiComponent --


Then, we look at what should be in the container. The dialog's label and grabber area are no brainers. We'll use a BiLabel and a BiImage for those and add them to the container --

The same goes for the close button. It's easy --

Now, let's look at the tab button and the tab pane. They're related in that when you mouseover the button, the content changes in the pane. So, what we'll do is create another container that holds the tab button, the tab pane and the content.

We will repeat this for each tab (there are five). Of course, we'll need to add this to our container. One benefit of doing it this way, is that we can add all the tab components and then they can be positioned together in one shot.

Note that each tab is already built up. In other words, we're not going to build them up when they are needed (i.e. when a mouseover occurs). We'll just use the power of CSS and style them so that they do not display if they're not moused over --


For now, the code uses a lot of inline styles and as an early prototype, that's fine. Right now, what we're after is to imitate behavior and look and not the reuse or maintainence of the component. Eventually, when we take this prototype and make it a reusable component/widget, we'll worry about that.

Let's look at how we handle the behavior for the tabs. When we mouseover the tab button, a number of things happen --

  • The text in the tab button is bolded
  • The tab pane appears with the new content
  • The previously selected tab is no longer bolded and its content is no longer displayed


Here it is translated into code for one of the tabs --

The last behavior is dragging the dialog and doing that in Bindows is easy. We just add the container to a BiMoveHandle component --


We've omitted the close button, but essentially it listens for the onclick event and in our case, simply displays an alert box that says "Clicked!"

That's it. What we end up with is our implementation and you can view the full source here.

In an upcoming entry, I'll address how we can turn this prototype into something reusable so that you can use it in your own code (we'll also get rid of the inline styling too).